Monthly Archives: January 2013

Steamed Vegetable Dumpling

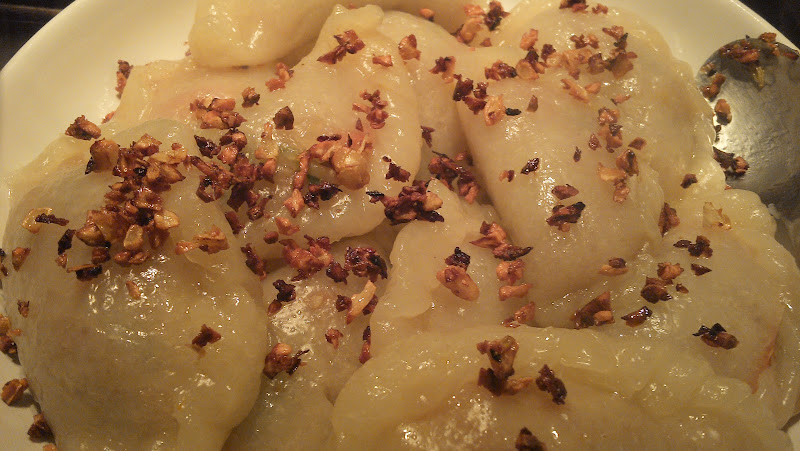
Steamed vegetable dumpling or known as “chai kueh” is one of my favourite nyonya food. Nyonya is the term for women descendants of the Malay-Chinese.

This dish is a simple dish with just few ingredients, i.e. chinese turnips or mooli as it labelled in Tesco, carrots, dried shrimps available in most of Chinese supermarkets in London, wheat starch and tapioca flour, boiling water and oil. I referred to my favourite blog of a Bee, Malaysian Nyonya food website:

http://nyonyafood.rasamalaysia.com/chai-kueh-steamed-vegetable-dumplings/2/

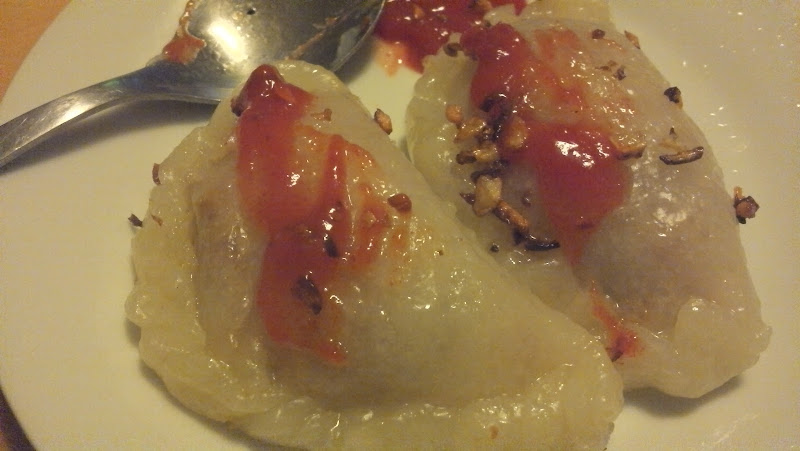
I like to eat the dumplings with fried garlic and chili sauce.

Ingredients

Fillings:

400 g mooli or Chinese Turnip (available at Tesco or Chinese supermarkets), julienne

100 g carrots, julienne

2-3 stalks of spring onions, julienne

1 bulb of garlic, chopped

2-3 tbsp dried shrimps, wash and soak for 10-15 mins (available at most Chinese supermarkets)

oyster sauce

salt and pepper

Skin:

165 g wheat starch flour (or “tang min fun” 澄麵粉)

85 g tapioca flour (or 樹薯粉)

420 ml boiling water

5 tbsp oil

Instructions:

1. Heat up 4-5 Tbsp oil and stir in half of the chopped garlic till fragrant. Add in dried prawns and fry till fragrant.

2. Add in carrots and Stir fry for about 5 minutes or till fragrant. Then add mooli and spring onion stir for another 4-5 mins till cooked. Add in salt, oyster sauce and pepper to taste. Season slightly more considering the skin is bland.

3. Leave it to cool.

4. In the meantime, prepare the steamer and if you are not going to use the Chinese simmer but 3 tier  vegetable steamer, I used the steaming bowl/ containers to put the dumplings. Oil the containers so that the dumplings won’t stick on it later on.

5. Moving on to the skin, first sift the flours and mix it. Then add a third of the boiling water and stir the flours and water with a wooden spoon. Add another third once the flour is mixed and finally the final third and mix it till a soft dough formed.

6. You need to knead the dough, but not immediately as it is too hot now. So let it rest for about 5-10 mins or at least when it is not too hot to handle.

7. Before kneading the dough, add tbsp of oil to the dough and knead. Continue to add oil if you can still see lumps in the dough. Knead till it is smooth looking.

8. Then roll it and divide into 30 pieces or so. Roll out a piece till about the size of your palm and put the fillings in the middle. Fold it and “pleat” the edge.

9. Put the finished dumpling in a container/ steamer/ steaming bowl and continue with the rest. Once it is all filled up, steam for 15-20 mins or when the dumpling is translucent.

10. Fried the chopped garlic so that you can sprinkle on top of the dumplings and don’t forget the chili sauce.

Categories: Food, Life, Recipe | Tags: , , | 3 Comments

“Mantau” Recipe

300 g all purpose flour (plain flour)

3 teaspoons baking powder

110g superfine sugar (caster)

1/2 cup or 125 ml milk

1/3 cup or 90 ml water

1/4 cup or 60 ml vegetable oil.

Instructions

1. Sift flour and baking powder into a bowl and add sugar.

2. Gradually add combined milk and water and mixing to form a soft dough.

3. Add oil 1 tsp and knead it on a work surface. Add another tsp of oil and knead till the dough is smooth.  Another cue is when there is no more lumps in the dough can be seen.

4. Wrap dough with cling film and let it rest in the fridge for an hour.

5. Meanwhile, cut 16 squares parchment or baking paper to place the buns later.

6. After an hour, take the dough out from the fridge and roll dough into a sausage shape, roundabout 16 inches long.

7. Cut into 16 pieces and roll each into a ball.

8. As this is mantou, therefore no fillings and these balls can be put on the parchment or baking papers.

9. Use a steamer to steam the mantou for about 15-18 mins.

Categories: Food, Life, Recipe | Leave a comment

Chocolate Fondant

IMG_20130119_135848_609

This is the 2nd attempt of my chocolate fondant. I didn’t take the picture of the first one I baked yesterday but I followed the instruction to only put the cake in the oven set to 200 degree Celcius for 10-12 minutes. I followed it but when I removed it out from its mould, only half of it cooked. Not the middle where the gooey  part should  be but the whole bottom part of the cake.

So I extended the time for the 2nd attempt to probably up to 25 – 30 minutes. I just want to make sure the bottom is cooked and not liquid. The bottom was ok, but so was the middle part. There is no chocolate oozing out as it should be. The middle is still a bit wet but taste good. The picture is a bit blur as I was wrestling with my husband to take the picture while he was busy helping himself with the cake.

The 3rd attempt, I shall only bake for 18-20 mins. The results will be updated.

Recipe (From BBC Gordon Ramsay)

http://www.bbcgoodfood.com/recipes/8168/chocolate-fondant

  • 50g melted butter , for brushing
  • cocoa powder , for dusting
  • 200g good-quality dark chocolate , chopped into small pieces
  • 200g butter , in small pieces
  • 200g golden caster sugar
  • eggs and 4 yolks
  • 200g plain flour

Instructions:

  1. First get your moulds ready. Using upward strokes, heavily brush the melted butter all over the inside of the pudding mould. Place the mould in the fridge or freezer. Brush more melted butter over the chilled butter, then add a good spoonful of cocoa powder into the mould. Tip the mould so the powder completely coats the butter. Tap any excess cocoa back into the jar, then repeat with 1 the next mould.
  2. Place a bowl over a pan of barely simmering water, then slowly melt the chocolate and butter together. Remove bowl from the heat and stir until smooth. Leave to cool for about 10 mins.
  3. In a separate bowl whisk the eggs and yolks together with the sugar until thick and pale and the whisk leaves a trail; use an electric whisk if you want. Sift the flour into the eggs, then beat together.
  4. Pour the melted chocolate into the egg mixture in thirds, beating well between each addition, until all the chocolate is added and the mixture is completely combined to a loose cake batter.
  5. Tip the fondant batter into a jug, then evenly divide between the moulds. The fondants can now be frozen for up to a month and cooked from frozen. Chill for at least 20 mins or up to the night before. To bake from frozen, simply carry on as stated, adding 5 mins more to the cooking time.
  6. Heat oven to 200C/fan 180C/gas 6. Place the fondants on a baking tray, then cook for 10-12 mins until the tops have formed a crust and they are starting to come away from the sides of their moulds. Remove from the oven, then leave to sit for 1 min before turning out.
  7. Loosen the fondants by moving the tops very gently so they come away from the sides, easing them out of the moulds. Tip each fondant slightly onto your hand so you know it has come away, then tip back into the mould ready to plate up.
  8. Starting from the middle of each plate, squeeze a spiral of caramel sauce – do all the plates you need before you go on to the next stage. (I skipped this part as not a big fan of caramel)
  9. Sit a fondant in the middle of each plate. Using a large spoon dipped in hot water, scoop a ‘quenelle’ of ice cream.
  10. Carefully place the ice cream on top of the fondant, then serve immediately. Repeat with the rest of the fondants. (I used yogurt instead).
Categories: Food, Recipe | Tags: , | 2 Comments

Create a free website or blog at WordPress.com.